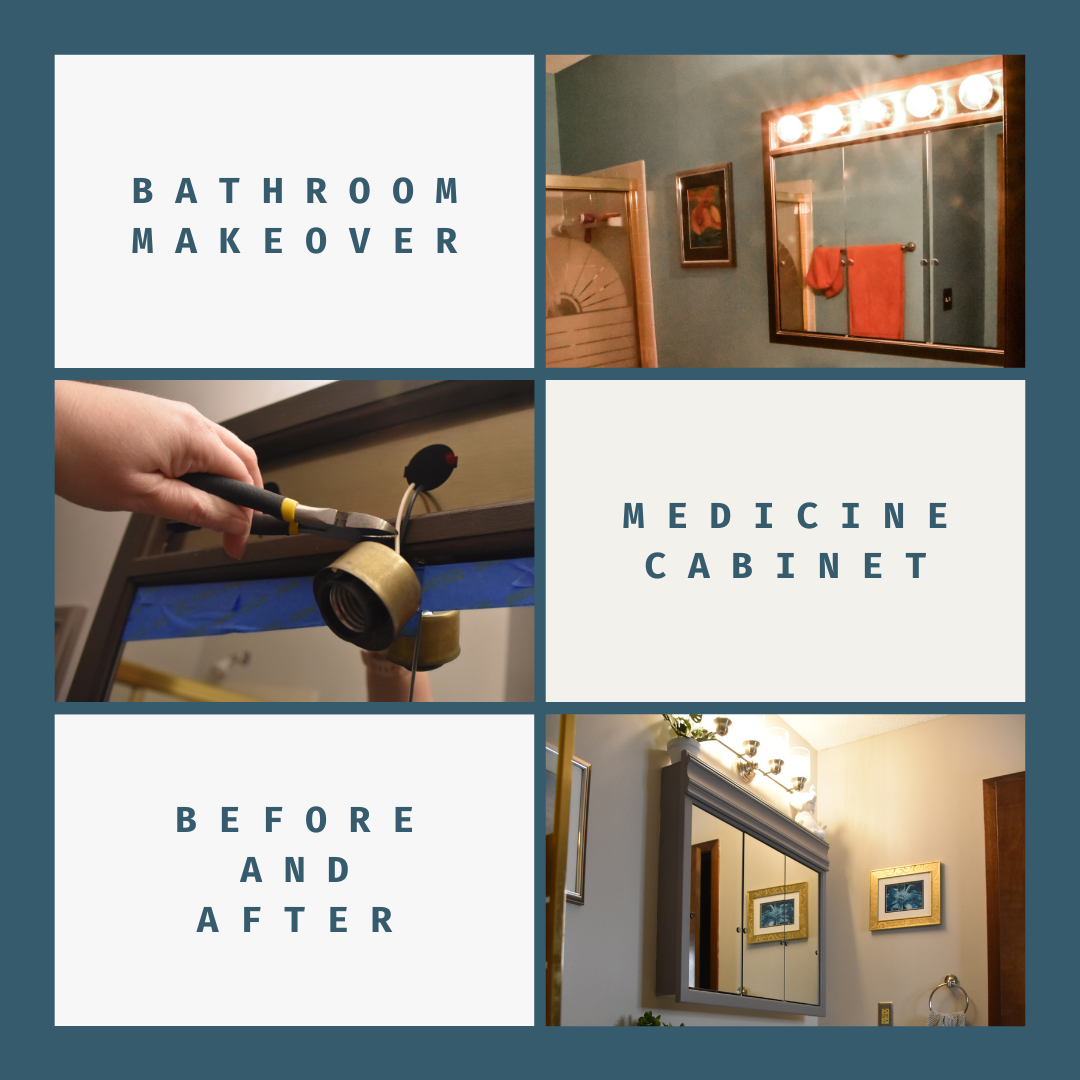
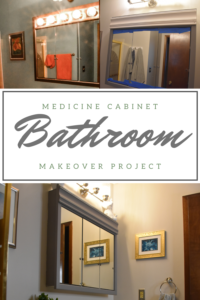
I’m progressing nicely through the bathroom makeover project and next up is the medicine cabinet. Much like the needed update for the vanity, the medicine cabinet needed a lot of love!! I’ve never been a huge fan of the medicine cabinet or the lights in my bathroom. The medicine cabinet light had Hollywood lights built into the medicine cabinet but also had a light fixture just above the cabinet as well. The light fixture was vintage 1983 and the medicine cabinet was not much younger. To make it worse, both were connected to a single light switch making it simply extra light, not task or mood lighting.
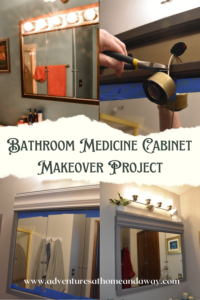
Twelve years ago, I attempted a small makeover and painted it to match the vanity. It looked nice at the time and was all I could afford. I could live with it. As I mentioned in a previous post about planning a home makeover project, some things are a must-do, others are a should-do, and the rest are a might-do. The medicine cabinet makeover was one of the first things added to the must-do list.
This article may contain affiliate links or ads. When you click these links, I may get a small commission. This does not cost you anything but helps me run this site. I only promote products I have used and enjoy.
It was BAD and needed to GO!! Not negotiable!!
After spending hours upon hours looking for inspiration online, I had a good idea of what I was going to do: remove the lights, cover the opening with a piece of flat wood, add molding around the top, and paint. As I was explaining my plan, my partner in crime said “don’t they sell crown molding wide enough to cover the opening?” I knew right away he was on to something….
A quick trip to Home Depot and I found the exact piece I needed. It was the perfect width and the style matched what I was going for!
I wanted the medicine cabinet color to match the vanity so I did not need any more paint. YEAH!! See why I suggest categorizing your projects???
Clean the Medicine Cabinet Exterior
The first step in the medicine cabinet makeover is to clean. If you read my previous post about my bathroom vanity makeover project you know why I say you need to clean first. If you didn’t read it you should. To summarize, it’s a bathroom, just use your imagination to think about what all that “grunge” actually is. Disgusting right!!
You don’t need to scrub every inch for hours but at minimum use a damp cloth to wipe the surface clean. I prefer to use a mixture of vinegar and water. This will also help the paint adhere evenly.
I was being lazy and left the contents inside the bathroom medicine cabinet. I was not planning on painting inside so why take the time to pull everything out? It was a good time however to check a few bottles for expiration dates. An important job that is often forgotten.
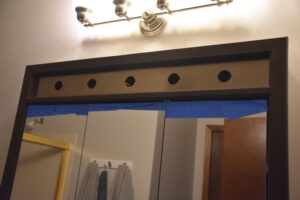
Remove the Hollywood Lights
This post is not about replacing the vintage 1983 light fixture. This is about the medicine cabinet makeover. In case you are reading this to follow the same plan on your cabinet, I need to make sure you are safe. If the existing lights are still connected to electricity, please make sure to disconnect them safely.
As I mentioned above the light fixture was attached to the same light switch. When I replaced the light fixture, I did not re-attach the medicine cabinet. This meant I could remove the lights without worrying about turning off the power first. I did decide however to be safe in case the next owner of my house finds the wires, they will not need to worry about if the wires are live. I used electrical tape to cover the wires. If you are working with hot wires (wires still connected to the electrical source), you will need to use electrical nuts to cover the wires.
Hoping to leave the medicine cabinet as intact as possible I tried to remove the light sockets without cutting the wires. I fought with it for an hour then gave up and decided to cut them off. Using a wire cutter worked well. Again, to be nice to the next owner, I covered the ends with electrical tape even though the wires were no longer hot. Tuck the wires back into the base of the medicine cabinet.
Paint the Bathroom Vanity Base
I opted to add a first coat of paint to the medicine cabinet base before covering the light socket holes. I did this because the crown molding, I bought was white and the base was chocolate brown. Because there is such a contrast, I wanted to make it easier on myself in the long run.
Any time you are painting, if you are going from dark to light or light to dark, it will take multiple coats! I’ve been painting walls and cabinets for years and no matter how expensive the paint is, it will take several coats.
And don’t always trust the “one coat coverage” or “paint and primer in one,” if you are going from a dark color to a lighter color, it will show though and you will need to do more than one coat. If you are going from white to cream, one coat is usually sufficient.
Add Crown Molding
Once the base was painted, it was time to add the crown molding to my bathroom medicine cabinet. This was my way of covering up the 1980’s aged brass and holes from the lights. Measure the length and cut it to size.
I added a small bead of wood glue around the medicine cabinet base opening and positioned the crown molding into place. I added a few finishing nails hidden in the trim design and let the glue dry a little. Since this is a bathroom medicine cabinet, I needed to make sure it was sealed from moisture.
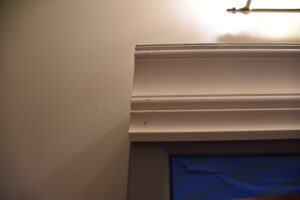
I added a bead of white paintable caulking around all four edges making sure to cover all gaps. Clean any excess with your finger or a damp paper towel. Fill any nail holes too!
Not only will this help make sure moisture does not get behind the crown molding, but it will also make for a seamless finish once you paint. It will look like a single piece of furniture. Not like several pieces were added together.
Follow the directions on the package for dry and cure times. Don’t paint before it’s fully cured!!
Paint the Bathroom Vanity Base Again and Again…
Ok back to more painting… make sure you clean up any remaining caulk by sanding the edges smooth first. Then add a coat of paint. The number of coats will depend on the original color you are trying to cover, the quality of the wood used for your bathroom medicine cabinet, and the look you are going for.
Why does the quality of the wood matter?
There is probably some scientific reason and if any contractors are reading this they will probably roll their eyes but my explanation is simple, if your bathroom medicine cabinet’s wood is old, dry, and uneven, the paint will settle weirdly in different spots.
Trust your gut, if the paint looks uneven or you think you can see a little of the old color still coming through, add another coat!
For my bathroom medicine cabinet project, I added three coats (4 if you count the coat I added before the crown molding.) Again, follow the dry and cure times on the paint can. Since this is in the bathroom, I intentionally timed the painting on a day that we could skip showering which would add more moisture to the paint extending the dry time.
Enjoy the “New” Bathroom Vanity
I am in LOVE with how this turned out!! It ended up way better than I thought it would and came in under budget. Even better!!!

Next up – Accessorizing and Finishing Touches
Did you miss my previous posts? Check out How to Replace a Toilet, Bathroom Vanity Transformation, and Bathroom Makeover Painting.
I am not a professional in any topics discussed on Adventures at Home and Away. All content on Adventures at Home and Away is for informational and educational purposes only. All comments made are my personal opinion and should not be used as professional advice.
Photography on Adventures at Home and Away is protected by copyright and licensing agreements. No photographs may be copied or reused unless a proper license agreement has been obtained.

