
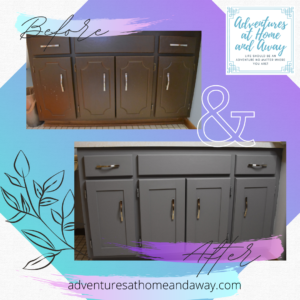
The bathroom vanity makeover is up next!! After finishing replacing the bathroom toilet, I knew the vanity needed to be done next. I had a vision in my head of what I wanted but was not sure how to execute it or how it would turn out. I played out the options in my head for waayyy too long but finally decided on my plan of execution and started to work. Now that it’s done, I could NOT be happier with the results!!!
This article may contain affiliate links. When you click these links, I may get a small commission. This does not cost you anything but helps me run this site. I only promote products I have used.
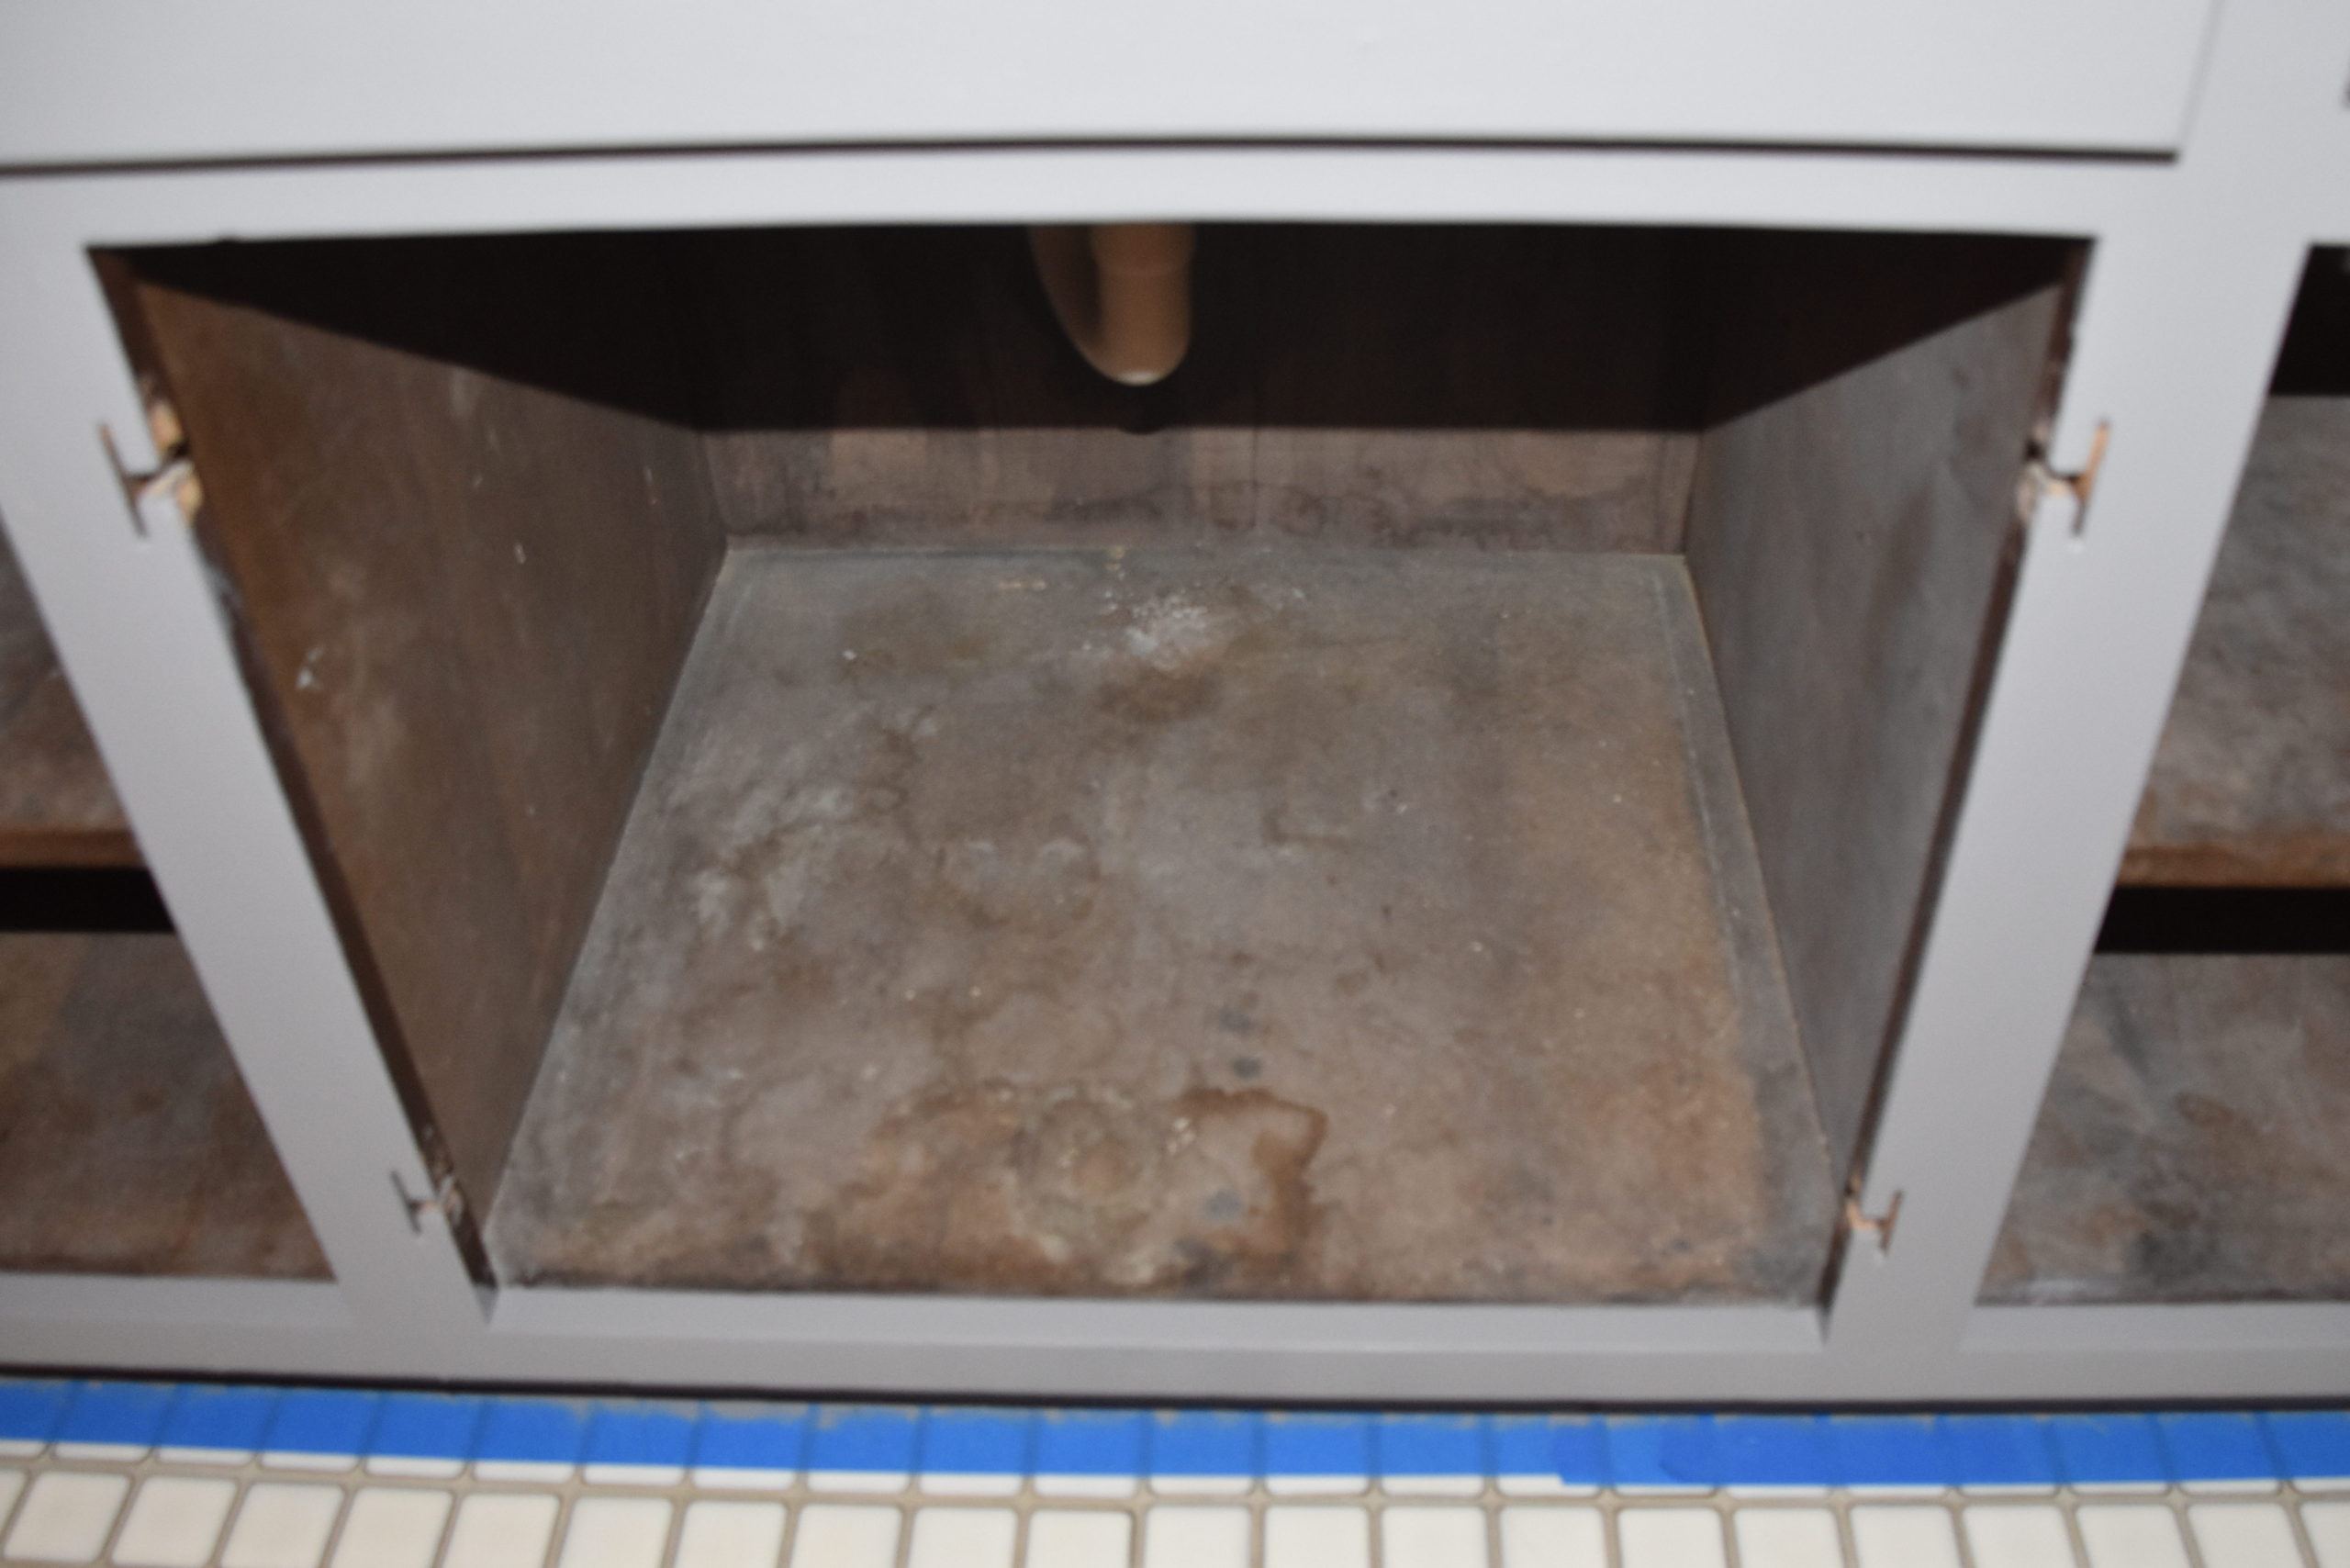
Clean
The first step of the vanity makeover project was to clean the old vanity. I know this is pretty self-explanatory but I can’t in good faith leave out an important step!!
Unrelated side note: I learned the importance of including even obvious steps in 4th grade. We were given a writing assignment to create a recipe for making a peanut butter and jelly sandwich for someone how did not even know what the PB&J looked like. Easy right!?!? WRONG!! My teacher took our recipes and did a demonstration of our recipes. I don’t recall anyone actually writing a recipe that worked. Hint, if you didn’t write down to the step of opening the peanut butter jar lid or opening the bread bag and removing two slices; you failed.
Back to the Bathroom Vanity, CLEANING!
Before you can do any work to update the bathroom vanity, you first need to remove the items inside: I.E. toilet paper, cleaning supplies, beauty products, and whatever you have stored in hopes your house guests never see.

Next, take a damp cloth and wipe down the surface. If you have a lot of “grunge” on the surface you may need to use a cleaning product or even mix some vinegar with water and spray the surface. Even if you don’t think this is important at first, once you start sanding, painting, etc., you will start to think about what that “grunge” may be…trust me, you will want to clean it.
Remove doors, drawers, and pulls from the bathroom vanity
The next step in the bathroom vanity makeover is to remove the doors and drawers. This step will depend on the type of hinges on the vanity. My home was built in 1983. The hinges they used are like none I’ve ever seen before. If you too have these, please post a comment so I know I’m not alone!!

Remove the door pulls using a screwdriver. Make sure you either put the screws and pulls into a baggie or put them in a safe place so they don’t get lost. (I lost a pull screw once and learned my lesson.)
The doors may not be the same if you have an older home. It’s a good idea to use a small piece of tape and number each door, pull, and hinge so you can easily match them to the correct location on the base unit.

The Hinges…..
Speaking of the hinges… my biggest concern with this bathroom vanity makeover was what to do with old hinges. I had looked for replacements but the primary home improvement stores (Home Depot, Lowe’s, etc.) had NOTHING!! An online search came up with some possible hits but nothing that gave me comfort that it would fit. I instead opted to spray paint the existing one. My original plan was to remove them from the base and the door but once I started on the first one I realized it would be virtually impossible to return them to the exact place on the door.

I needed a plan B… It was a bit awkward but I decided to spray paint them while still on the door. I used silver spray paint and was planning to use a similar hue of gray paint so I was not worried about covering the overspray. I spray painted first with the hinges “open,” let it dry, then another coat with the hinges “closed,” and let it dry. This made sure all pieces of the hinge were exposed to the paint. To make sure it looked even, I spray-painted a second coat with the hinges “closed” since this is the part seen most. Follow instructions on the can for dry times.

Fill Grooves
If you too have these lovely vintage 1980’s vanity doors with routed groves; I feel your pain. There are limited options. My first plan was to use wood putty to fill in the grooves, sand, paint, and be done. I was NOT happy with the results. I anticipated I might now like it so I did only one door as a test run, and I had a plan B ready to go. More on that is below.

I don’t know if this step is needed but I used fine grit sandpaper to rough up the existing paint to help the wood putty stick to the vanity doors. Then, using my finger, I scoped up some wood putty and pressed it into groves. This was harder to do than I thought it would be. It seemed to work best when I did a small amount first and then added a second layer. Don’t be afraid to go over the edges and it does not matter if it is smooth. You will need to sand it in the next step anyway. Follow the instructions of the wood putty you use for dry time.
Sand Bathroom Vanity Doors
Once the putty is dry on the vanity doors, use some medium grit sandpaper to lightly sand off the excess wood putty. I started doing this by hand at first but realized it would be quicker if I used my palm sander. This not only smoothed out the wood putty in the groves but also roughed up the rest of the door for the painting step.

Add trim pieces
For my bathroom vanity makeover, I used Mull Casting ¼ in x 2 in poplar wood. Since the plan is to paint, using a more expensive wood, like oak, is not necessary. Carefully measure the door front and cut the casting wood to size.
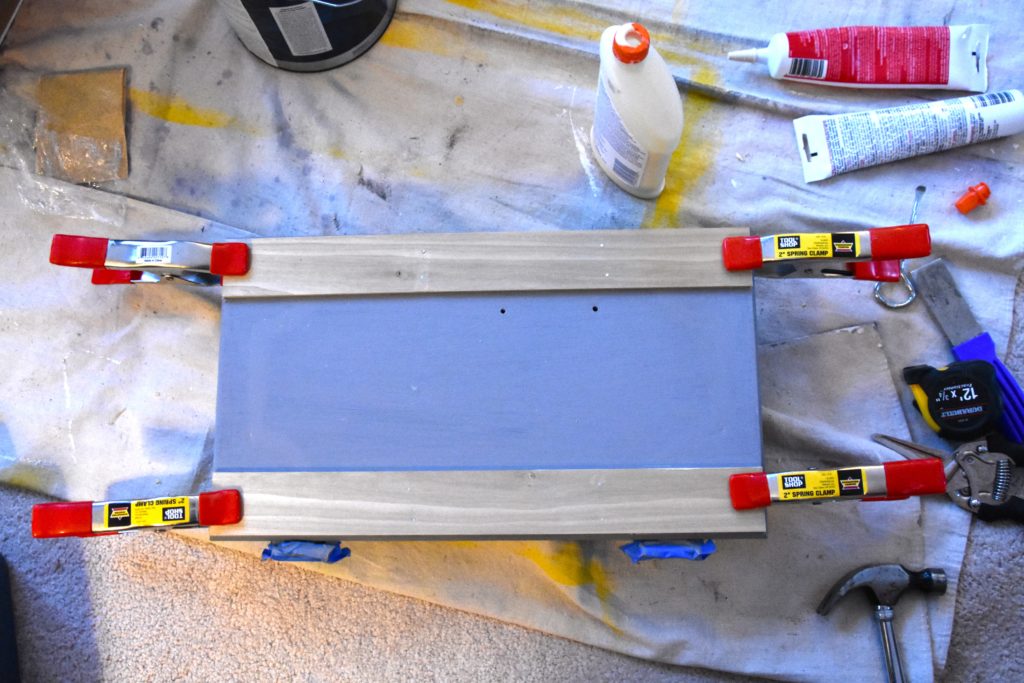
I used 2 in wide casting because it was a nice balance to “frame” the door and it did not cover the existing holes for the pulls. If you like the look of something wider, you may need to redrill holes for the pulls. If you do, make sure you fill the holes with wood putty, and sand before you move on to paint.
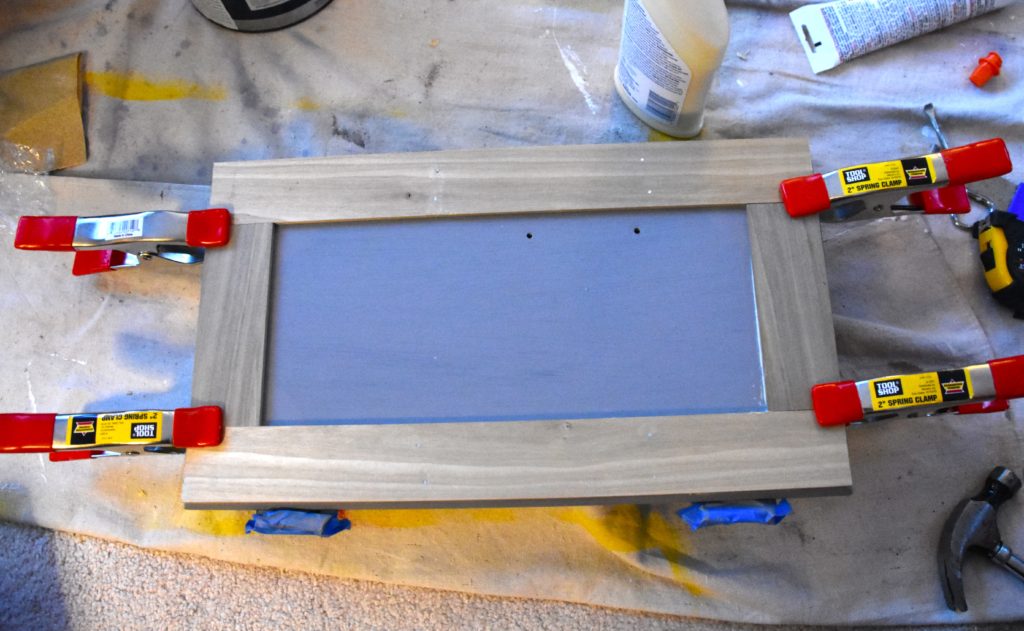
To attach the trim to the vanity door, I used a bead of wood glue and some finishing nails. Clamp the trim to the door and let it dry overnight. If you have small clamps use a small piece of cardboard or wood to protect the surface from dents.
If your nail holes are deep you can use the wood putty to fill in the nail holes. Gently sand once the putty is dry.
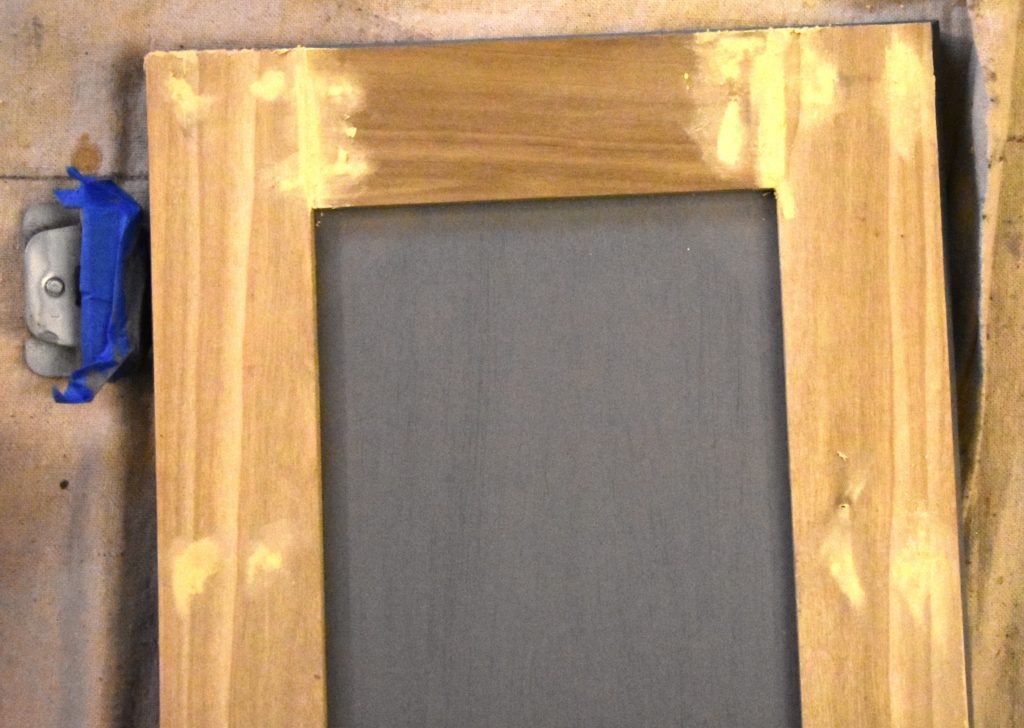
Caulk and Seal Bathroom Vanity Doors
An essential step of the bathroom vanity makeover is to seal the trim edges. Since bathrooms have excess moisture, you want to make sure you protect your work from water damage. The best way to do this is by using a paintable tub/tile caulking to seal the seams. I used DAP Kwik Seal Plus!
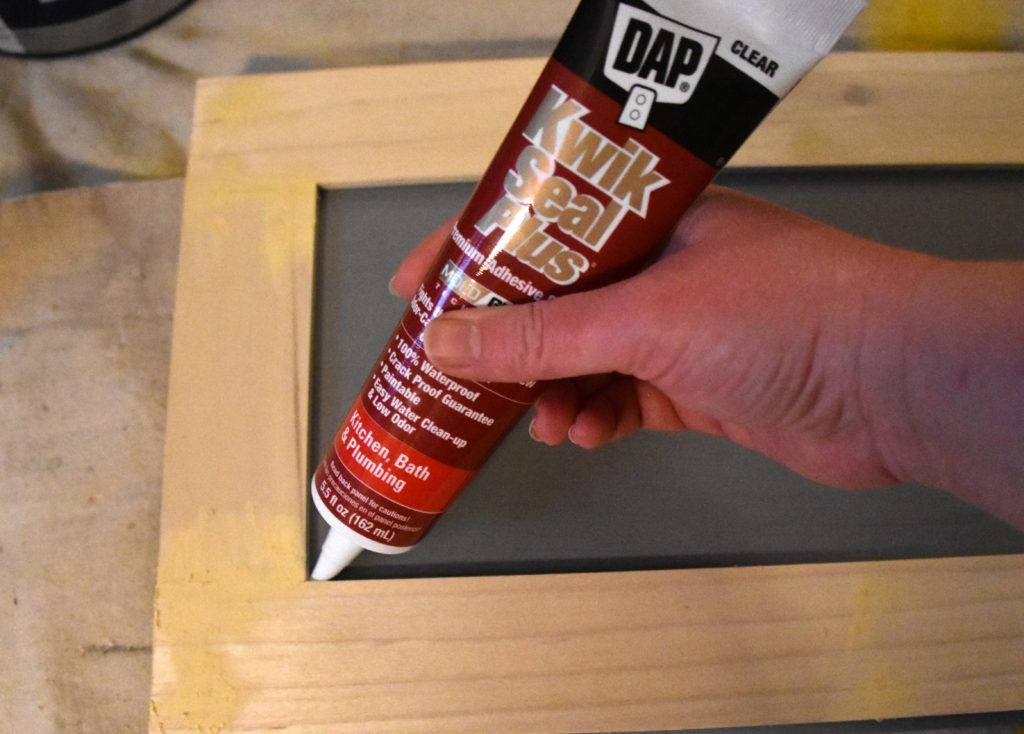
Cut the tip of the caulking tube at an angle then squeeze a small amount around the inside and outside of the vanity trim pieces. Use your finger to remove the excess. Put a small bead of caulking on the seams of the trim board as well. Follow package instructions for dry time.
Paint Doors
Your bathroom vanity makeover is finally at the step where you start to see how I will look when done; painting! If you are going from a dark color to a light color, you may want to consider adding a coat of paint primer first. I was going from a chocolate brown to medium gray color. I considered a primer step but opted to just buy paint and primer in one.
Side Note: In hindsight I should have done the primer step. Not because it impacted the end product but because the trim pieces were raw wood and the existing color was chocolate brown. I needed to do three coats of paint and could have possibly had the same look in 1 coat if I had done the primer coat first. Oh well…I had the paint and the time so it was not an issue.
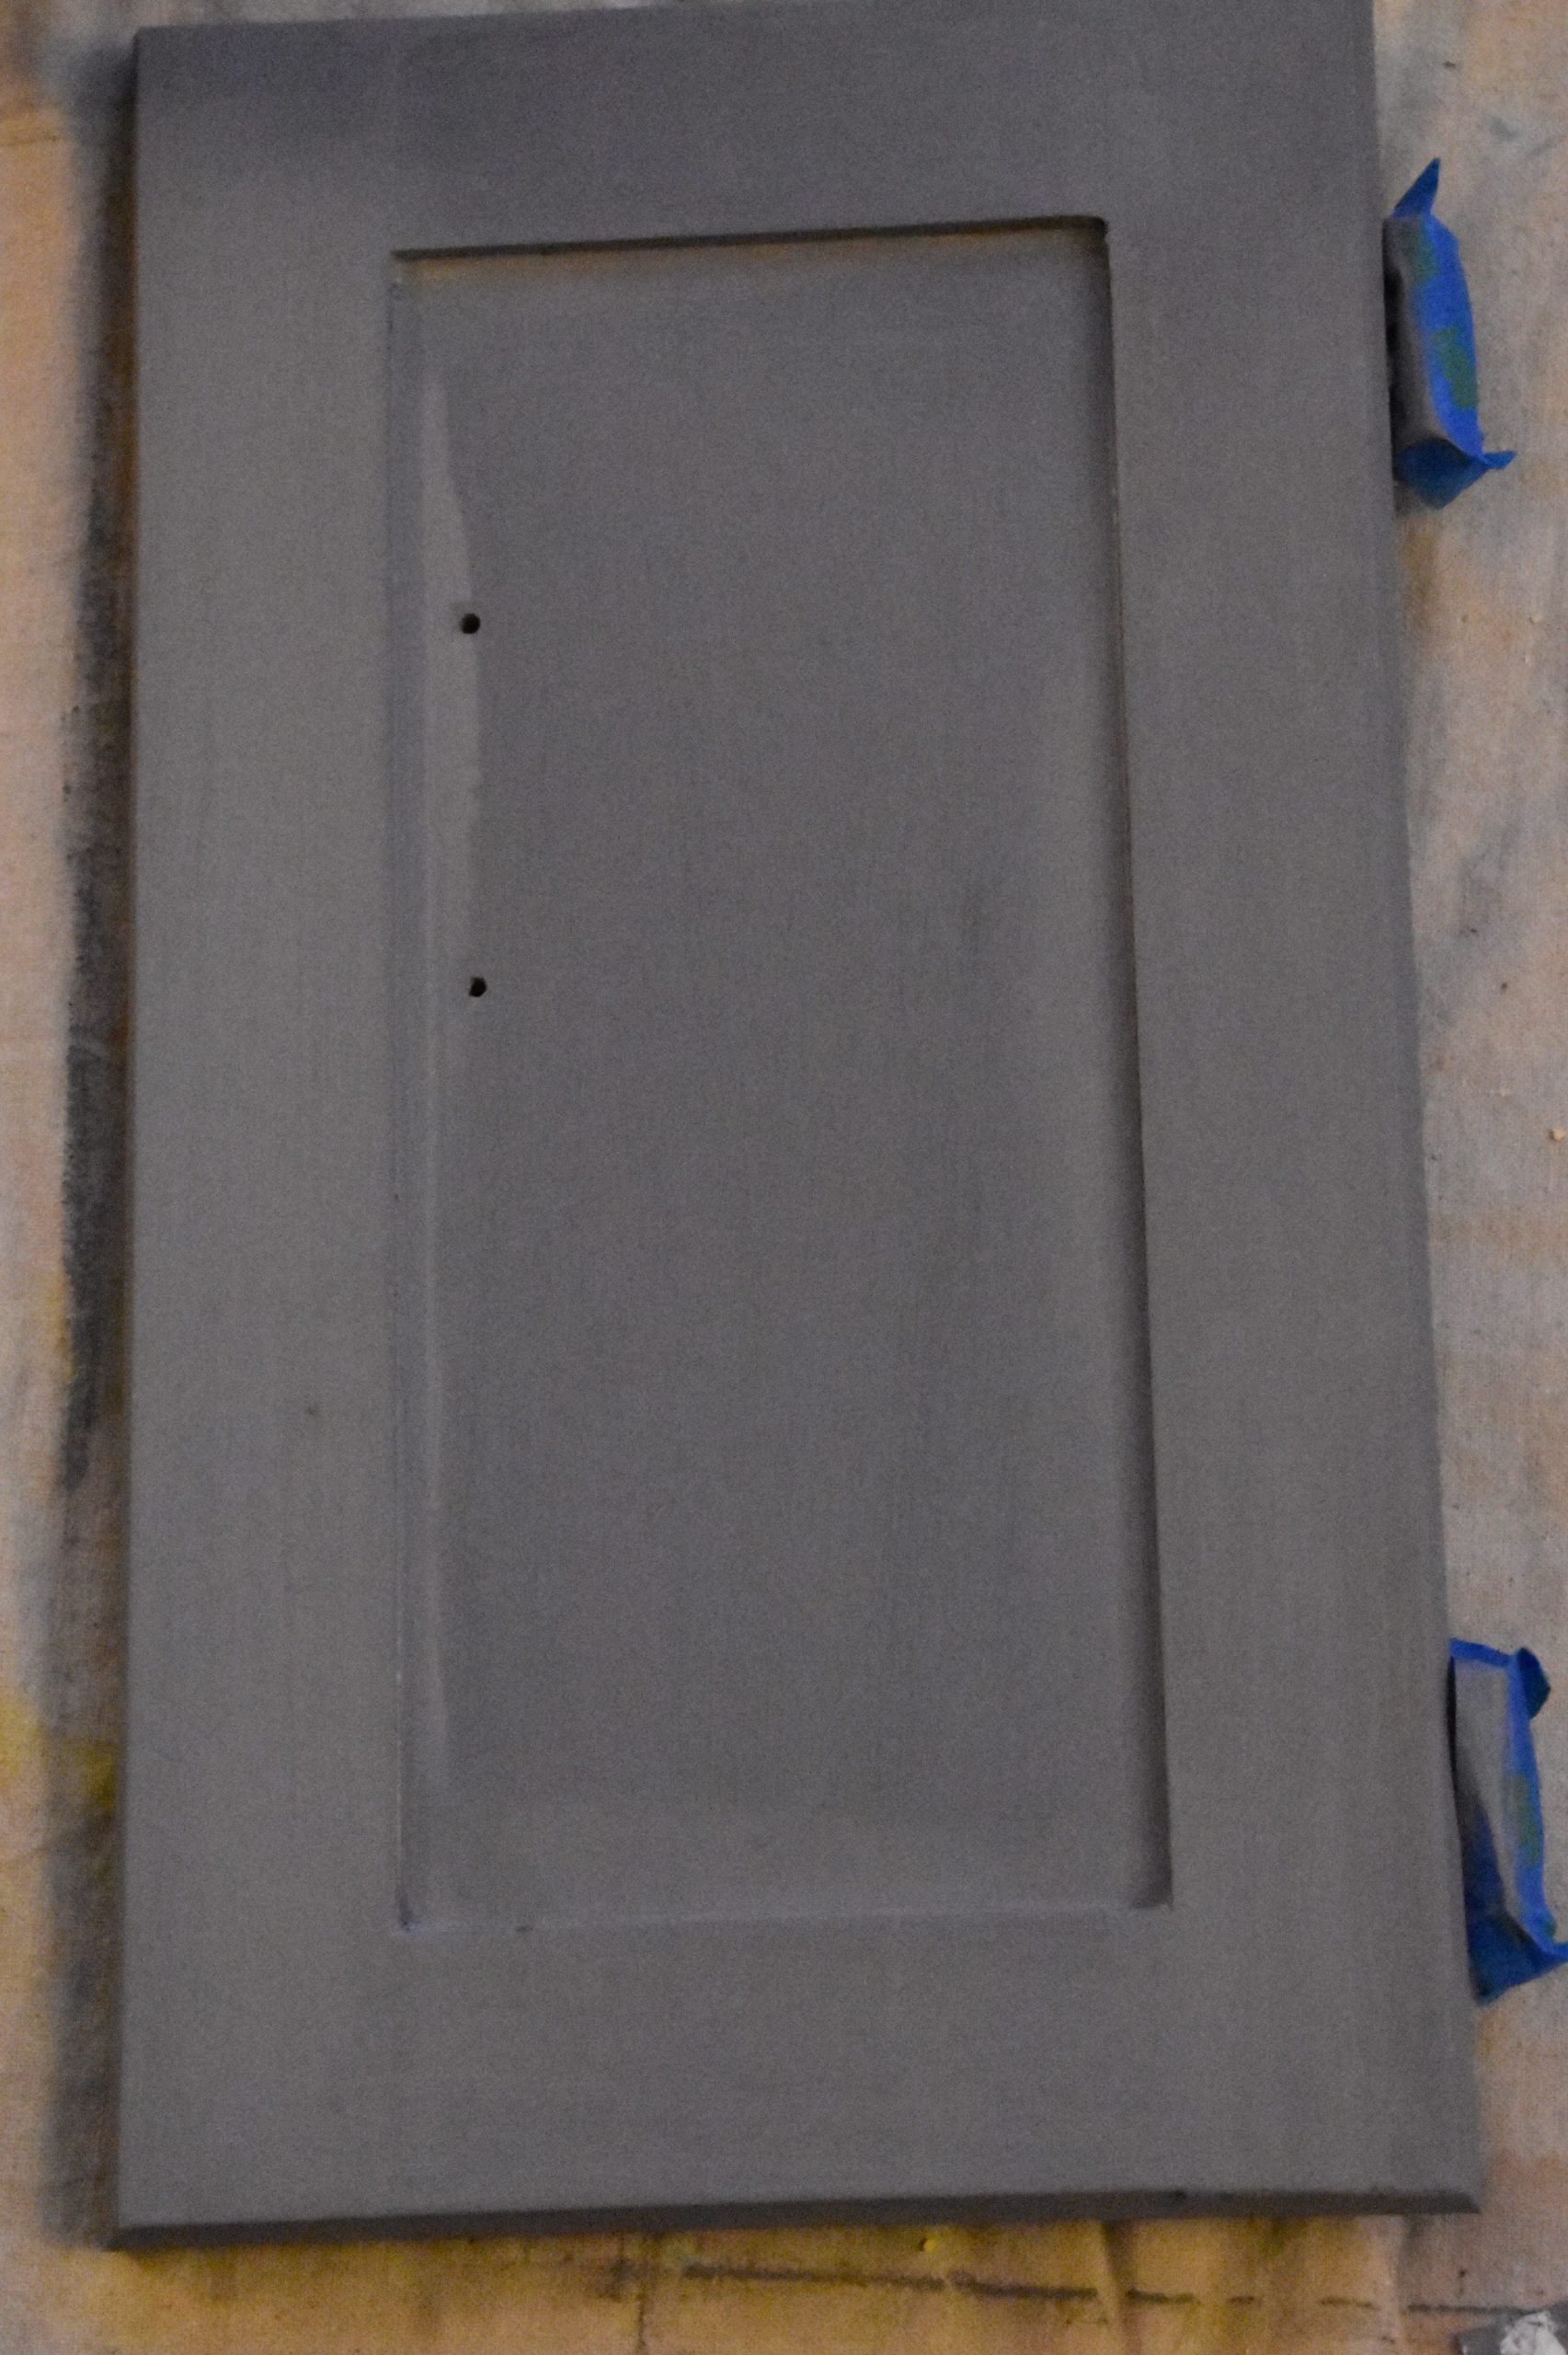
Painting cabinet doors can be time-consuming unless you have a way to hang them and paint both sides during the same sitting. I do not have a way to paint both sides at once so it took me several days to paint. Once one side was dry I turned it over and painted the other side.
Painting Doors Option
A possible option if you don’t need to use the bathroom going through the makeover, you can paint the base first (see next step) then once dry, add the doors back to the base and paint the doors once they are reattached. There are pros and cons to this since you will need to leave the doors open for 24 hours between each coat to let the paint dry. But you can cut out a couple of days for your project completion time by painting both sides at the same time.
Paint Bathroom Vanity Base
The vanity makeover would not be complete if you don’t paint the vanity base. Depending on your situation you may want to use painter’s tape on the walls and floor. I plan on painting the walls shortly; I did not take the time to tape the walls. The flooring however is not on the list so protecting the existing tile is important!
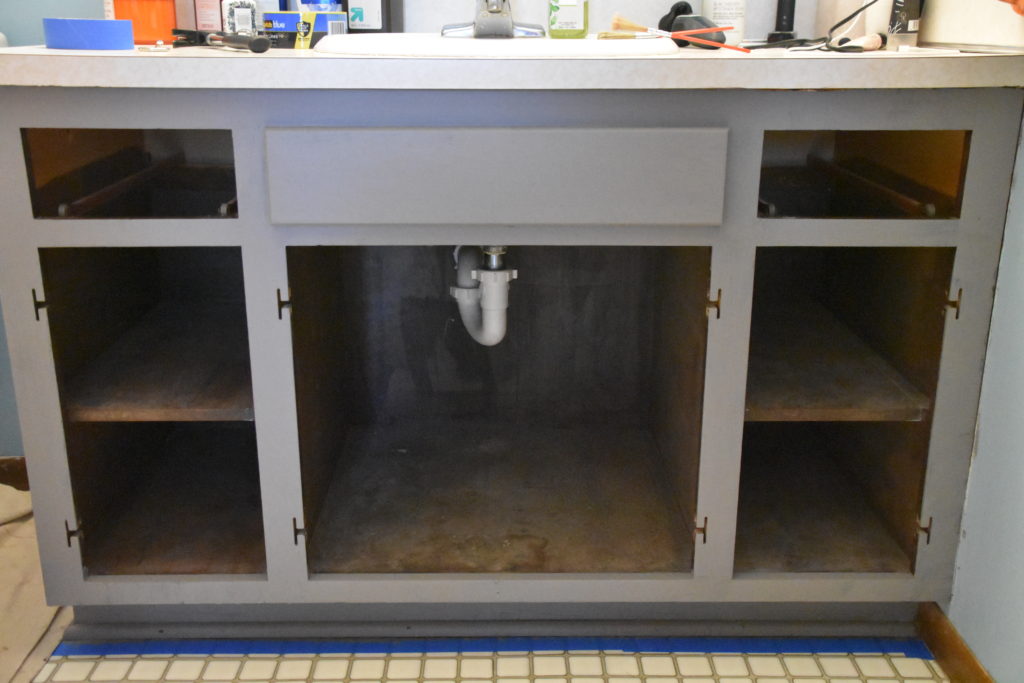
Once the floor around the bathroom vanity is taped off and the base unit was cleaned, it was time to paint. Depending on the size you may opt to use a paint roller. My vanity is relatively small so we used a paint brush instead. My partner in crime did this step while I worked on the doors! It never hurts to have some help. Thanks!
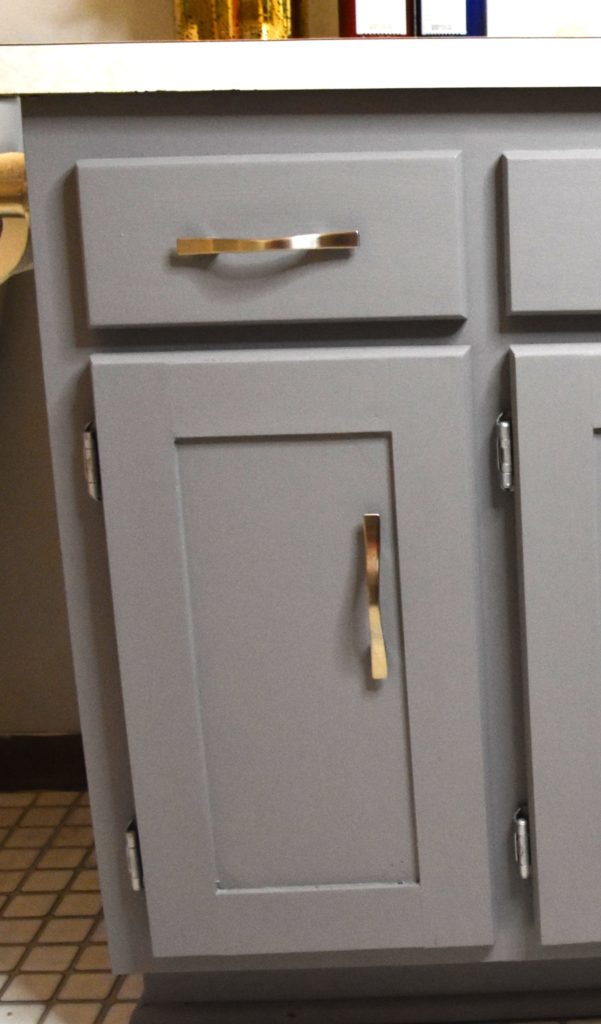
Replace Bathroom Vanity Hardware
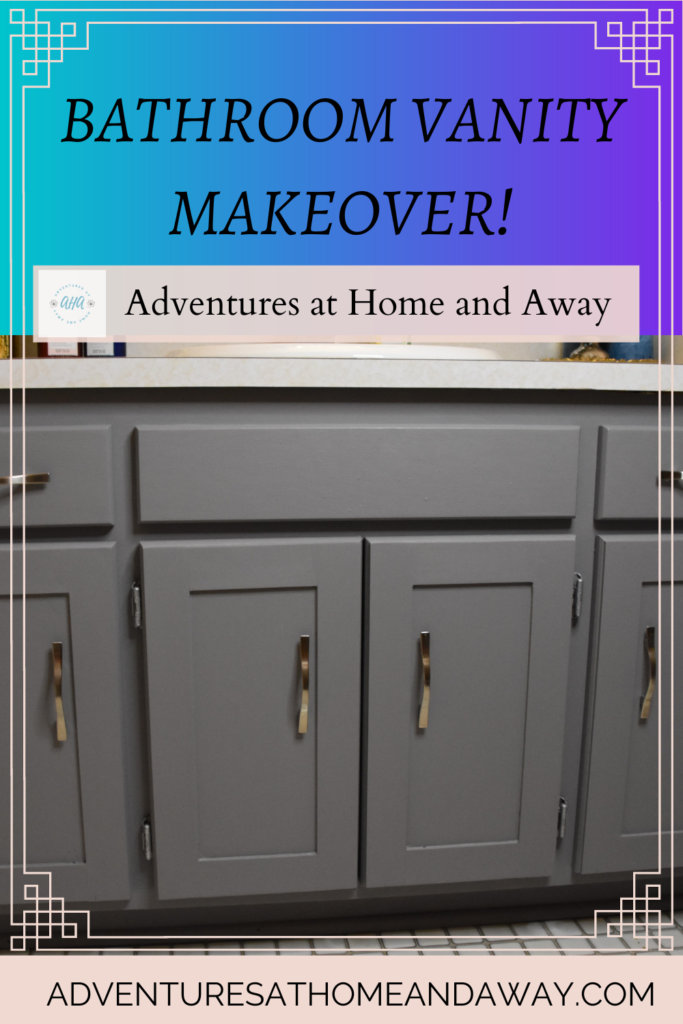
Now that the paint is dry, it’s time to replace the hardware. In my case, this was the door pulls. If yours are outdated, you may want to replace them or at minimum spray paint. My existing pulls are still in great condition and still look on trend so I decided to keep them.
Replace Vanity Doors
Once all of the hinges and pulls are replaced on your bathroom vanity, it’s time to re-attach them to the base. If you numbered them as suggested above it will be easier to put them back where they belong. Make sure to tighten all screws and wiggle the doors to make sure they are secure.
Line Vanity “Floor”
This is an optional step depending on the age and antithetic you want in your vanity makeover; addressing the inside of the vanity. For my makeover project, I decided to line the floors of the vanity with contact paper. I know, this sounds very 1970’s grandma like but they make gorgeous contact paper! Check out the selection at your local hardware store or even target! I used a faux-aged wood contact paper and could not be happier with the results!!
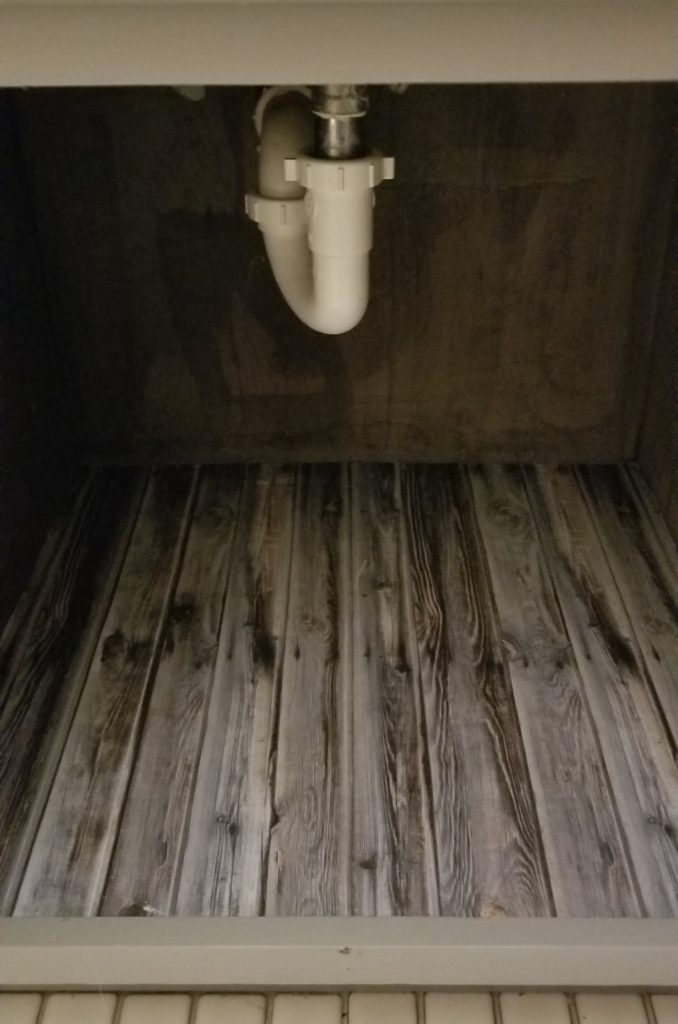
Cut the contact paper to size, peel the back off, then starting at the front of the vanity slowly press the contact paper onto the surface. Use your hand or a squeegee to smooth out the bubbles. Trim any excess around the edges with a utility knife or even your fingernail.
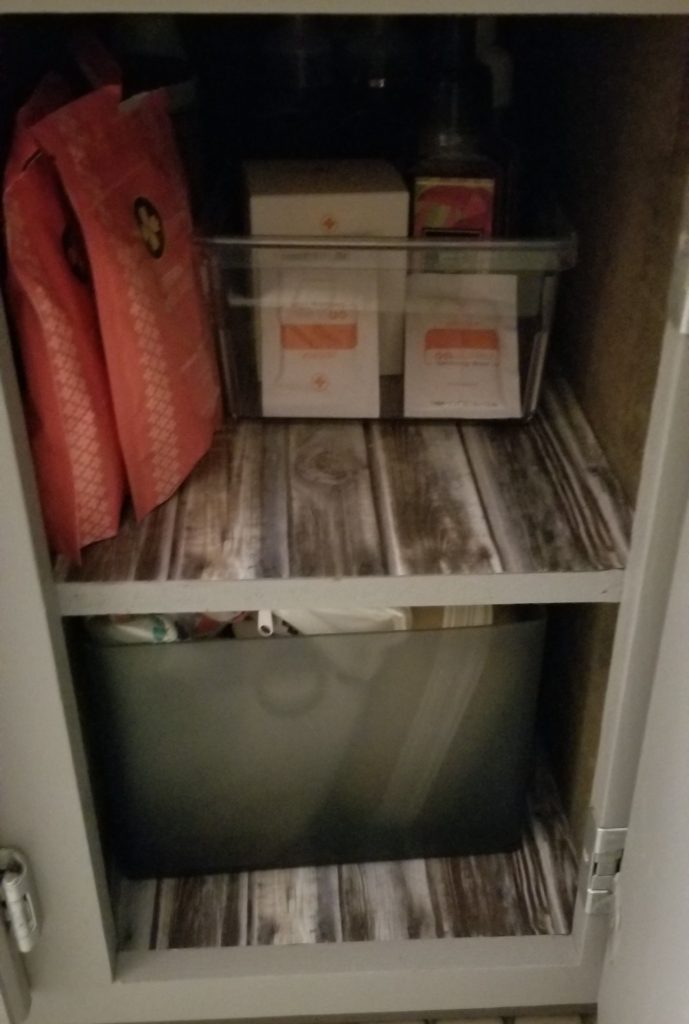
Organize
The final touch is to put everything back into the newly made over vanity! This is a perfect time to throw out any old, expired, or unused products. There is also a no better time to get organized. I purchased some refrigerator storage bins that hold things perfectly!
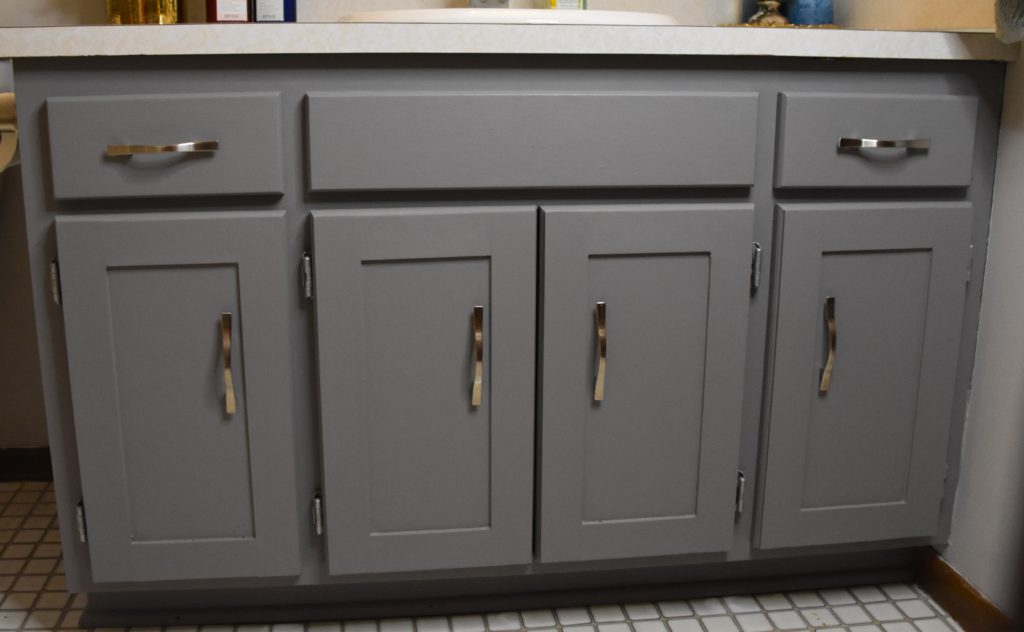
The Final Vanity Makeover
I am so happy with how the vanity makeover turned out! There were a few snags along the way and a couple of plan B options were used but all in all, I LOVE IT!! Don’t forget to update your home makeover tracking document!!
Next up…. Painting the walls!!
What projects have you completed that worked out better than you imagined?
I am not a professional in any of the topics discussed on Adventures at Home and Away. All content on Adventures at Home and Away is for informational and educational purposes only. All comments made are my personal opinion and should not be used as professional advice.
Photography on Adventures at Home and Away is protected by copyright and licensing agreements. No photographs may be copied or reused unless a proper license agreement has been obtained.

